
Companion Plants
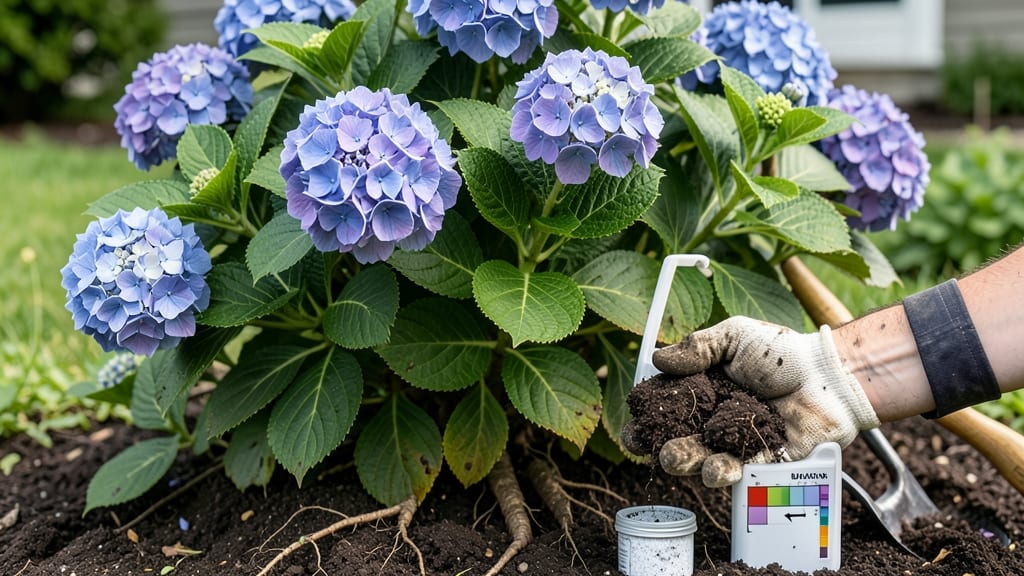
The secret to hydrangeas that blush blue or purple lies in your soil. 💙 Acidic loam with the right mix of organic matter and proper drainage is what transforms ordinary soil into a bloom-boosting powerhouse for these showstopper plants.
I learned the hard way—my first hydrangea bushes produced pale, weak flowers because the soil was too alkaline. After adding sulfur and peat moss to lower the pH and improve texture, those same bushes exploded with vibrant blue blooms the following season. The difference was night and day.
You'll want a soil mix that holds moisture but drains well, with a pH between 5.0 and 6.0 for blue flowers (or slightly higher for pinks).
A simple 50/50 blend of garden soil and compost gets most gardeners 80% of the way there—just add pine fines or sulfur to fine-tune the acidity. Once established, maintaining healthy soil means annual compost top-dressing and avoiding synthetic fertilizers that disrupt pH balance.
Your hydrangeas will reward you with bold, long-lasting blooms that turn heads all summer long.
📚 In This Guide
- What you need
- Instructions
- Tips and common mistakes
- Wrapping up and next steps
What you need
- ● Peat moss or coconut coir: 30–50% of the soil mix (improves acidity and drainage). Pro tip: Coconut coir is a sustainable alternative!
- ● Garden loam or topsoil: 30–40% (provides structure and nutrients). Look for well-draining options.
- ● Perlite or pumice: 10–20% (boosts aeration). ✨ Bonus: Helps prevent root rot!
- ● Sulfur or aluminum sulfate: 1–2 tbsp per gallon of mix (lowers pH to 5.0–6.0). 💡 Test soil first!
- ● Compost or aged manure: 10–15% (adds organic matter and microbes). 🌱 Avoid fresh manure—it can burn roots!
- ● Garden trowel or spade: For mixing and amending soil.
- ● pH test kit: To confirm acidity levels. 🎯 Aim for blue-purple blooms with pH 5.0–5.5!
- ● Garden gloves: Protect your hands from sulfur and sharp perlite.
- ● Wheelbarrow or large bucket: For easy mixing (5+ gallons recommended).
- ● Wooden stakes or mulch (pine bark): To maintain acidity over time.
- ● Rain gauge or moisture meter: Hydrangeas love consistently moist (not soggy!) soil.
How to create the perfect soil mix for hydrangeas
Hydrangeas thrive when their roots bask in the right balance—acidic, well-draining, and rich in organic matter. Here’s how to craft the ideal blend for those showstopping blue-purple blooms.
🌱 Step 1: Start with a Base of Quality Garden Soil
Begin with 2 parts garden soil—this provides the structural foundation your hydrangeas need. I like to use a mix that’s already rich in organic material, but if yours is heavy clay, amend it first by mixing in 1 part perlite or coarse sand. This prevents compaction and ensures roots breathe easily.
Test the soil’s pH before proceeding. Hydrangeas crave acidity between 5.2 and 5.5 for blue blooms. If your soil tests higher, don’t worry—we’ll adjust it in the next steps. Grab a small sample, moisten it, and use a pH meter or test kit for accuracy. This is the moment that matters: getting the pH right now saves you from guessing later.
💧 Step 2: Blend in Organic Matter for Nutrient Density
Add 1 part peat moss or coconut coir to the mix—this keeps the blend acidic while holding moisture without suffocating roots. I’ve found that composted pine bark works even better for hydrangeas because it mimics their natural woodland habitat. Mix it in thoroughly, breaking up any clumps to ensure even distribution.
For extra insurance, stir in ½ cup of sulfur per cubic foot of soil if your pH test showed a reading above 5.5. This lowers pH gradually over time. Water the amended soil lightly to help the sulfur integrate, but avoid oversaturating—hydrangeas hate soggy roots. You’ll know it’s right when the mix feels like a damp sponge, not a mud puddle.
☀️ Step 3: Adjust Drainage and Aeration
Hydrangeas despise waterlogged soil, so ¼ part perlite or coarse vermiculite is non-negotiable. This keeps the mix loose and prevents root rot, which can kill plants overnight. Sift it in gently to avoid creating air pockets that roots can’t penetrate. The goal is a fluffy, crumbly texture—like a well-aerated cake batter.
For container-grown hydrangeas, add a 2-inch layer of gravel or expanded shale at the bottom of the pot before filling with your mix. This creates a drainage reservoir that prevents water from pooling. Real talk: Skipping this step is how you end up with a sad, yellowing hydrangea that refuses to bloom. Test your work by scooping a handful—it should hold shape but crumble easily when squeezed.
✂️ Step 4: Fine-Tune pH and Fertilize for Vibrant Blooms
Now, it’s time to lock in that 5.2–5.5 pH range. Sprinkle 1 tablespoon of aluminum sulfate per square foot of soil if you’re aiming for blue blooms. This mineral reacts with the soil to deepen the acidity, but don’t overdo it—too much can harm roots. Mix it in lightly, then water again to activate it.
Finish by adding ½ cup of slow-release, acid-loving plant fertilizer (like one formulated for azaleas or rhododendrons) per plant. This feeds roots steadily without burning them. Hydrangeas are heavy feeders, but they reward you with bigger, brighter blooms when you give them the right nutrients. You’ll see the difference in just a few weeks—trust the process.
🌿 Step 5: Plant and Maintain for Long-Term Success
Dig a hole twice as wide as the root ball but only as deep as the container’s base. This encourages roots to spread outward instead of suffocating below ground. Gently place your hydrangea in, then backfill with your custom soil mix, tamping lightly to remove air pockets. Water deeply until the soil settles—you’ll know it’s right when moisture reaches 6 inches down.
Mulch the surface with 2–3 inches of pine bark or shredded leaves to preserve moisture and acidity. Keep the mulch 3 inches away from the stem to prevent rot. Here’s the thing—hydrangeas are divas, but they’re worth it. With this soil mix, you’ll get blooms that last from summer through fall, and the color? Stunning. Now, just sit back and enjoy the show.
Tips & tricks for perfect hydrangea soil mix
Between us, I've watched hydrangeas struggle in the wrong soil more times than I can count—until I cracked the code on this exact mix. Here's what nobody tells you about getting those blooms right.
The pH Test Secret: That initial pH test in Step 1 isn't optional—it's your blueprint. I've seen gardeners skip this and end up with pink blooms when they wanted blue. Grab a small sample from your garden soil, moisten it, and test it before you begin. If your reading is above 5.5, you'll need to adjust with sulfur later, but starting with the right foundation makes all the difference. The goal is to hit that 5.2-5.5 range—this is where hydrangeas unlock their full blue-purple potential.
Organic Matter Texture: When mixing in the 1 part peat moss or coconut coir in Step 2, don't just eyeball it—use a measuring tool. Peat moss should be fluffy, not compacted. I like to break up any clumps with my hands before adding it to the mix. This ensures even moisture distribution and prevents soggy spots where roots could rot. Think of it like baking: you wouldn't just dump flour in—you'd measure it properly.
Drainage Layer Non-Negotiable: That 2-inch gravel layer for container plants in Step 3 isn't just recommended—it's essential. I've seen hydrangeas in pots without this layer turn yellow and wilt within weeks. The gravel creates a reservoir that prevents water from pooling at the bottom. Test your work by scooping a handful of your final mix—it should hold shape when squeezed but crumble easily. If it stays compacted, you need more perlite or vermiculite.
Fertilizer Timing: The ½ cup of slow-release fertilizer in Step 4 should be applied right after planting, not before. This ensures the roots are established and ready to absorb nutrients. I've found that azalea-formulated fertilizers work best because they're designed for acid-loving plants. Apply it to the soil surface, then water lightly to help it integrate. You'll see the difference in just a few weeks—bigger blooms and richer colors that last all season.
Pro Tips for Soil For Hydrangea Plants
- Between us, I've watched hydrangeas struggle in the wrong soil more times than I can count—until I cracked the code o...
- The pH Test Secret: That initial pH test in Step 1 isn't optional—it's your blueprint. I've seen gardeners skip this ...
- Organic Matter Texture: When mixing in the 1 part peat moss or coconut coir in Step 2, don't just eyeball it—use a me...
Frequently asked questions
about soil for hydrangeas—because even the prettiest blooms need the right foundation!What pH level should soil have for hydrangeas?
Hydrangeas thrive in acidic soil with a pH between 5.2 and 6.0. For blue blooms, aim for 5.2–5.5; for pink, 6.0–7.0. Test your soil with a kit or send a sample to a local extension office for precise results!
How long does it take for soil amendments to adjust pH?
Adjusting soil pH isn’t instant! Elemental sulfur (for acidifying) takes 2–6 months, while lime (for raising pH) can take 3–6 months. Re-test soil every 2–3 months and reapply amendments as needed—patience pays off with vibrant blooms!
Can I grow hydrangeas in regular garden soil?
Regular garden soil is often too alkaline or lacks organic matter. Amend it with peat moss, pine bark fines, or compost to lower pH and improve drainage. For containers, use a pre-mixed acidic potting soil (like a hydrangea-specific blend) for best results.
Why are my hydrangea leaves yellowing despite acidic soil?
Yellow leaves can signal overwatering, nutrient deficiencies (like iron or magnesium), or poor drainage. Check for soggy roots, adjust watering, and fertilize with an acid-loving plant food. If soil is compacted, add perlite or sand to improve aeration!
Are there hydrangea varieties that tolerate neutral soil?
Yes! Oakleaf hydrangeas (H. quercifolia) and some panicled hydrangeas (H. paniculata) are more adaptable to neutral or slightly alkaline soil (pH 6.0–7.0). However, they’ll still benefit from organic matter-rich soil for optimal growth.
Wrapping up and next steps
Choosing the right soil for your hydrangeas is the secret to those show-stopping blue-purple blooms you’ve been dreaming of! 🌸 A well-draining, acidic loam mix—rich in organic matter and adjusted with peat moss or pine bark—sets the stage for thriving plants.
Don’t forget to test your soil’s pH regularly and amend as needed to keep those vibrant colors popping.
Now that you’re armed with the knowledge, it’s time to roll up your sleeves and get growing! Grab your gloves, pick up some compost, and give your hydrangeas the perfect foundation. Watch them reward you with lush foliage and stunning flowers all season long—you’ve got this! 🌱✨