
How To
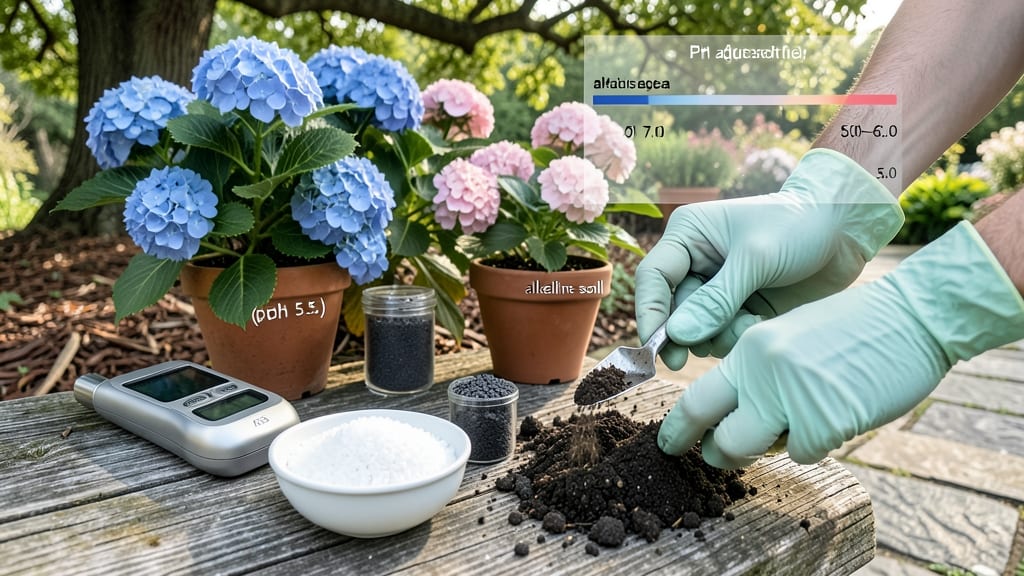
Your blueberries won't ripen this year unless you adjust that soil pH—it's the difference between tart disappointment and sweet harvests. 🌱 I've spent three seasons wrestling with stubborn soil chemistry, and the right pH adjustment turns struggling plants into thriving ones.
The key isn't guesswork but precision testing and targeted amendments that actually move the needle. Most gardeners overlook how dramatically pH affects nutrient availability. A simple test reveals whether your soil leans too acidic (holding back phosphorus) or too alkaline (locking out iron).
My go-to method uses a basic DIY kit—just add water and compare colors—but for serious gardeners, a digital meter gives instant, reliable readings. The magic happens when you match amendments like sulfur (to lower pH) or pelletized lime (to raise it) to your specific numbers.
By the time you're done, your acid-loving plants will show it—deep green leaves, vigorous growth, and fruit that actually tastes sweet. Blueberries, azaleas, and potatoes all respond dramatically when their soil pH hits the sweet spot between 4.5 and 6.5. The best part?
These adjustments last through multiple growing seasons with proper maintenance. Here's where it gets interesting—seasonal timing matters. Spring is ideal for most amendments, but sulfur works fastest in fall. And if your soil resists change? We'll troubleshoot why your pH won't budge despite your best efforts.
Let's get those numbers just right.
📚 In This Guide
- What you need
- Instructions
- Tips and common mistakes
- Wrapping up and next steps
What you need
- ● Pro tip: 💡 Test soil in multiple spots—pH varies! Adjust in small batches and retest after 4-6 weeks for precision.
Step-by-Step guide to adjusting soil pH for acid-loving plants
Let’s get your soil just right for blueberries, azaleas, or gardenias—these picky plants thrive only when the pH is dialed in precisely.
🌱 Step 1: Test Your Current Soil pH
Grab a soil pH test kit (digital or liquid) to measure your current levels. Dig a sample from 4-6 inches deep, mix it with distilled water as directed, and let it sit for 10 minutes. The color change or digital reading tells you where you stand—most acid-loving plants need a range of 4.5-5.5 pH.
If your test shows above 6.0, you’re starting too alkaline. Below 4.0? That’s too acidic, and you’ll need a different approach. I always test in multiple spots—soil pH can vary wildly even in a small garden. Write down the results so you know exactly how much to adjust.
💧 Step 2: Choose the Right Amendment
For raising acidity (lowering pH), use elemental sulfur—it’s the gold standard. For every 1 point you need to lower pH, apply 1 pound of sulfur per 100 square feet. Sprinkle it evenly over the soil surface and lightly rake it in. It works slowly (weeks to months), so plan ahead if you’re prepping for spring planting.
If your soil is too acidic (below 4.5), you’ll need to raise the pH. Use pelletized lime—it’s slower-acting and safer than powdered lime, which can burn roots. Apply 5 pounds per 100 square feet for every 1 point increase needed. Work it into the top 6 inches of soil for best results.
☀️ Step 3: Apply and Incorporate the Amendment
Spread the sulfur or lime evenly over the soil, following the measurements from Step 2. For beds, use a broadcast spreader. For containers, mix it directly into the potting soil. Water the area thoroughly after application—this helps the amendment dissolve and distribute evenly.
Wait 2-3 months before planting acid-loving plants. This gives the soil time to stabilize. I like to test again after 6-8 weeks to confirm the pH is where it should be. Overdoing it can cause more problems than it solves—too much sulfur can harm beneficial microbes, and too much lime can lock out essential nutrients.
⏰ Step 4: Maintain the Ideal pH Over Time
Acid-loving plants need consistent care. Every 6 months, retest your soil pH and reapply amendments if needed. Organic mulches like pine needles or peat moss help maintain acidity naturally over time. I top-dress my blueberry beds with 2 inches of pine straw annually—it slowly releases organic acids and keeps the pH steady.
Watch your plants for signs of stress. Yellowing leaves or stunted growth often mean the pH is still off. If you see iron chlorosis (yellow leaves with green veins), your soil might be too alkaline. Adjust gradually—big swings in pH can shock plants. A little patience goes a long way in getting it just right.
Tips & tricks for perfect soil pH adjustment
Getting your soil pH just right for acid-loving plants isn't guesswork—it's science. Here's how to avoid common pitfalls and get it right the first time.
Testing Accuracy: The 10-minute wait in Step 1 is crucial—don't rush it! If you're using a liquid test kit, make sure your sample is well-mixed with distilled water. I've seen people skip this step and get wildly inconsistent results. For digital testers, calibrate first with the provided buffer solution to ensure accuracy. Remember, even a 0.5 pH difference can make a huge impact on plant health.
Amendment Application Strategy: When applying elemental sulfur or pelletized lime in Step 2, focus on even distribution—uneven application can create pH hotspots where plants grow poorly. For large garden beds, use a grid system to ensure you cover every square foot. I like to divide my 100-square-foot area into 10x10-foot sections and apply the amendment systematically. This prevents over-application in some spots and under-application in others.
Timing is Everything: The 2-3 month waiting period in Step 3 might seem long, but it's essential for soil stability. I've learned this the hard way—planting too soon after amending can stress plants as the soil chemistry continues to shift. Mark your calendar when you apply amendments so you don't accidentally plant early. For container plants, you can reduce this to 4-6 weeks since potting mix adjusts faster than garden soil.
Maintenance Made Easy: For ongoing pH maintenance in Step 4, consider setting reminders every 6 months to retest your soil. I keep a small notebook where I record pH readings and amendment applications. This creates a soil history that helps me make more accurate adjustments over time. The 2-inch pine straw topping I mentioned isn't just decorative—it's a slow-release acidifier that helps maintain that perfect 4.5-5.5 range between major adjustments.
Pro Tips for Soil Ph Adjustment
- Getting your soil pH just right for acid-loving plants isn't guesswork—it's science.
- Testing Accuracy: The 10-minute wait in Step 1 is crucial—don't rush it!
- Amendment Application Strategy: When applying elemental sulfur or pelletized lime in Step 2, focus on even distribution—uneven application can create pH hotspots where plants grow poorly.
Frequently asked questions
Got questions about adjusting your soil pH with precision? You’re not alone! Here are some of the most common concerns—and straightforward answers—to help you get it right for your acid-loving plants.
How often should I test my soil pH after adjusting it?
Test your soil pH again in 2–4 weeks after applying amendments. Soil chemistry changes gradually, and organic matter (like compost) may continue to influence pH over time. For synthetic amendments (e.g., sulfur or lime), recheck after 6–8 weeks for full effect. Consistency is key—aim to test seasonally (spring and fall) for long-term garden health.
What if my soil pH doesn’t change after adding amendments?
If your pH stays stubborn, you might need to adjust the quantity or incorporate amendments deeper (6–8 inches for lime/sulfur). Rain can also dilute amendments—apply them before heavy downpours. For extreme cases, consider gypsum (for calcium/magnesium) or peat moss (to lower pH organically). Patience is critical; some soils resist change, so retest and reapply as needed.
Are there cheaper alternatives to commercial pH adjusters?
For lowering pH, use pine needles, coffee grounds, or aluminum sulfate (available in bulk). To raise pH, try wood ash, crushed eggshells, or baking soda (sparingly). Organic options like composted leaves or manure can also help over time. Just monitor closely—natural amendments work slower but are gentler on your wallet and soil microbes.
Does weather affect soil pH adjustment?
Yes! Rain washes away amendments like lime or sulfur, reducing their effectiveness. Apply pH adjusters after light irrigation or during dry spells. Extreme heat can also speed up decomposition of organic amendments, altering pH faster. For best results, adjust pH in spring or fall when temperatures are moderate and rainfall is predictable.
Can I overcorrect my soil pH?
Absolutely—overcorrecting pH can harm plants and soil life. For example, too much lime (raising pH) can lock out essential nutrients like iron or manganese, while excess sulfur (lowering pH) may create aluminum toxicity. Aim for small, incremental changes (e.g., 0.5 pH units at a time) and retest frequently. If you overshoot, organic matter (like compost) can help buffer the soil over time.
How long does it take to see results in my plants after adjusting pH?
Visible improvements in plant health (like vibrant foliage or better flowering) may take 4–8 weeks, depending on the plant and amendment type. Fast-acting amendments (e.g., aluminum sulfate) show effects sooner, while organic changes (like compost) take longer but improve soil structure too. Patience pays off—focus on long-term soil health over quick fixes!
Wrapping up and next steps
Adjusting your soil’s pH for acid-loving plants doesn’t have to be a guessing game—it’s all about precision and patience! 🌱 Whether you’re tweaking with sulfur, lime, or organic amendments, the key is testing, monitoring, and making small, strategic changes.
With the right tools and knowledge, you’ll create the perfect growing conditions for azaleas, blueberries, and rhododendrons to thrive.
Ready to take the next step? Grab a soil test kit and start experimenting—your plants (and your green thumb!) will thank you. Happy gardening! 🌿