
How To
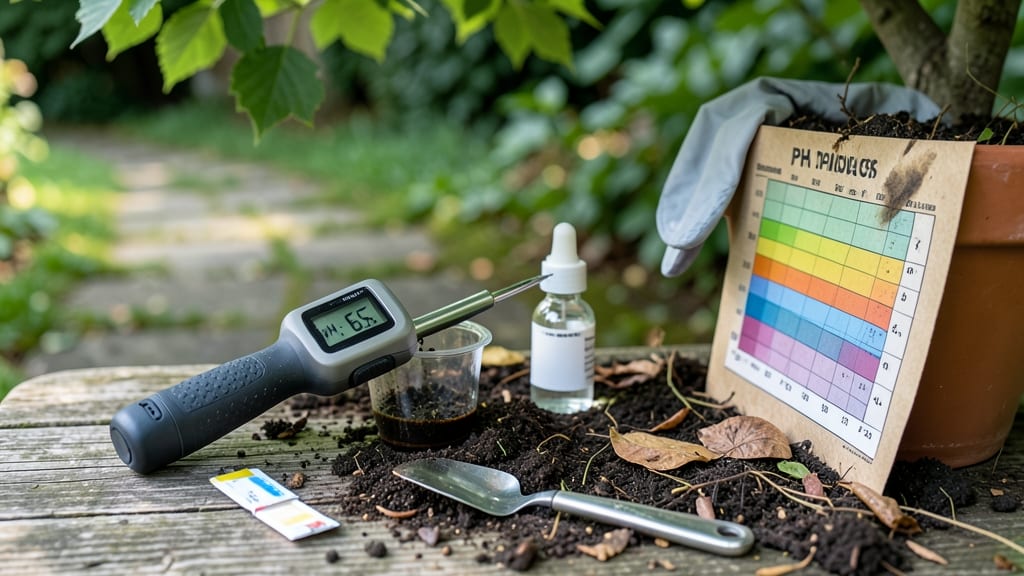
Your blueberries and azaleas won’t thrive unless you know your soil’s acidity level—and a soil pH calculator makes it shockingly simple. I used one last spring to turn my struggling blueberry bushes into a ripening, berry-laden powerhouse, and the process took less than an hour.
The key? Testing first, then adjusting with the right amendments.
Most garden centers sell test kits for $10–$20, but you can DIY with vinegar, baking soda, and a spoon. Drop a soil sample in water, then add a few drops of vinegar—if it fizzes, your soil’s alkaline and needs sulfur.
For azaleas and blueberries, aim for a pH between 4.5 and 5.5. Too high, and your plants starve; too low, and they burn.
Once you’ve got the number, the fix is straightforward: add elemental sulfur for acidity or lime for alkalinity, then retest in 6–8 weeks. My soil went from a pH of 6.2 to 5.0 in two months, and the difference in plant health was night and day.
The berries were bigger, the leaves stayed vibrant, and the blooms lasted all summer.
This method works for rhododendrons, camellias, and even potatoes—just tweak the target pH. No more guessing, no more wasted amendments. Here’s how to do it step by step, without the science jargon.
📚 In This Guide
- What you need
- Instructions
- Tips and common mistakes
- Wrapping up and next steps
What you need
- ● Soil sample – Collect 1-2 cups of fresh soil from the garden bed (avoid surface debris).
- ● Distilled water – 1 cup (tap water can skew pH readings).
- ● pH testing kit – Digital meter ($15-$30) or liquid test kit ($10-$20).
- ● Small container – A clean, 2-4 oz plastic or glass cup for mixing.
- ● Spoon or trowel – For stirring the soil-water mixture.
- ○ Lime (pelletized or hydrated) – Optional but recommended for adjustments (e.g., 1 lb per 100 sq ft for acidic-loving plants).
- ○ Sulfur (elemental or aluminum sulfate) – Optional for lowering pH (follow package rates).
- ● Gloves – To keep hands clean while handling soil or amendments.
- ● Measuring spoon – For precise lime/sulfur doses (¼ tsp increments).
- ● Notebook & pen – To log pH readings and amendment notes.
- ● Garden calculator or app – For scaling amendments to bed size (e.g., Square Foot Garden Calculator).
- ○ pH buffer solution – Optional for calibrating digital meters (check kit instructions).
How to adjust soil pH for acid-loving plants like blueberries and azaleas
Here's how I tweak soil chemistry for acid-loving plants—no guesswork, just precise adjustments.
Test Your Current Soil pH
Start with a reliable soil test kit designed for pH measurement. Collect soil samples from 4-6 inches deep in multiple locations around your planting area—don't just test one spot. Mix the samples together for an average reading. I like to test in the morning when soil is cooler, as temperature can slightly affect readings.
Follow the kit instructions to prepare the sample, usually involving mixing soil with distilled water. Wait 10-15 minutes for the color to develop fully. Compare the color to the chart provided—most kits use a color scale from red (low pH) to blue (high pH). Blueberries and azaleas thrive at a pH between 4.5 and 5.5, so aim for that range.
Choose the Right Acidifier for Your Soil Type
For sandy soils, I recommend elemental sulfur—it breaks down slowly and lowers pH gradually. For clay or loamy soils, peat moss works better because it retains moisture and acidifies as it decomposes. If your soil is already slightly acidic (pH 6.0-6.5), cottonseed meal is a gentler option that also adds organic matter.
Apply the acidifier evenly across the soil surface where you'll plant. For elemental sulfur, use 1 pound per 100 square feet for every 1.0 pH point you need to lower. For peat moss, spread 2-3 inches over the area and mix into the top 6 inches of soil. Water thoroughly after application to help the amendments integrate.
Mix Amendments Into the Soil
Use a garden fork or tiller to work the acidifier into the top 6-8 inches of soil. This ensures even distribution and prevents localized pockets of high or low pH. If you're planting in containers, mix the amendment directly into the potting soil at a ratio of 1 part amendment to 3 parts soil for peat moss or 1 part sulfur to 10 parts soil for elemental sulfur.
Water the amended soil deeply after mixing to help activate the amendments. Avoid overwatering, as this can wash away sulfur before it has a chance to work. Let the soil settle for 2-4 weeks before planting. This gives the amendments time to adjust the pH gradually—rushing this step can stress plants or create harmful pH fluctuations.
Monitor and Retest the Soil pH
After 4-6 weeks, retest the soil pH using another test kit. Acidifying soil takes time, and you may need to apply more amendment if the pH hasn't dropped enough. Keep detailed notes of your adjustments—this helps track progress and avoid over-acidifying, which can harm beneficial soil microbes.
Once the pH is in the ideal range (4.5-5.5), maintain it by adding a light layer of sulfur or peat moss annually, especially if you notice new growth slowing or leaves yellowing. For container plants, flush the soil with water every 3-4 months to prevent salt buildup from amendments.
Tips & tricks for perfect soil pH adjustments
Precision is everything when creating the ideal growing environment for acid-loving plants—here's how to avoid common pitfalls and get it right the first time.
Sampling Strategy: When collecting soil samples in Step 1, focus on areas where you'll actually plant rather than just the surface. Use a clean trowel to dig down to 4-6 inches and take at least 5-6 samples from different spots around your planting area. Mixing these thoroughly gives you an accurate reading of the entire zone where roots will grow. I've seen gardeners skip this step and end up with inconsistent pH levels that confuse their plants.
Acidifier Application Insight: In Step 2, the key to even distribution is working the amendments into the top 6-8 inches of soil—not just spreading them on top. For elemental sulfur, I recommend using a broadcast spreader for large areas to ensure uniform coverage. If you're working with containers, mix the sulfur or peat moss directly into the potting soil before planting to prevent clumping that could create localized pH extremes.
Timing is Critical: The 10-15 minutes you wait for color development in your soil test kit is crucial—rushing this step can lead to inaccurate readings. I've learned this the hard way: once I got impatient and checked the color too soon, only to discover my soil needed more acidification than I thought. Keep a timer handy and resist the urge to peek early. For best results, test in the morning when soil temperatures are cooler, as heat can accelerate chemical reactions and affect accuracy.
Maintenance Matters: The annual maintenance tip in Step 4 is often overlooked, but it's essential for long-term success. I recommend setting a calendar reminder to check your soil pH every spring, especially if you notice new growth slowing or leaves turning yellow. For container plants, the 3-4 month flush schedule prevents salt buildup that can actually raise pH over time—a common mistake that defeats the purpose of your acidification efforts.
Pro Tips for Soil Ph Calculator
- Precision is everything when creating the ideal growing environment for acid-loving plants—here's how to avoid common pitfalls and get it right the first time.
- Sampling Strategy: When collecting soil samples in Step 1, focus on areas where you'll actually plant rather than just the surface.
- Acidifier Application Insight: In Step 2, the key to even distribution is working the amendments into the top 6-8 inches of soil—not just spreading them on top.
Frequently asked questions
Got questions about using a soil pH calculator to perfect your blueberry or azalea beds? You’re not alone! Here are answers to the most common queries—so you can get back to gardening with confidence.
How accurate is a soil pH calculator compared to a test kit?
A soil pH calculator provides a quick estimate based on your inputs (like compost or fertilizer types), but a lab test or home kit is more precise. Use the calculator for general guidance—then verify with a test kit before amending soil. For acid-loving plants like blueberries, accuracy matters!
How long does it take for pH adjustments to work?
Adjustments aren’t instant! Organic amendments (like sulfur or pine needles) can take 2–6 months to shift pH, while lime (for raising pH) may show results in 1–3 months. Test soil every 4–6 weeks to monitor progress. Patience pays off for happy azaleas!
Can I use vinegar or lemon juice to lower pH quickly?
While vinegar or lemon juice can lower pH temporarily, they’re not reliable for long-term soil health. They also harm beneficial microbes. Stick to sulfur, peat moss, or pine bark for safe, gradual acidification. Think of it like dieting—quick fixes backfire!
What if my soil pH keeps fluctuating after adjustments?
Fluctuations often mean water runoff or organic matter breaking down. To stabilize pH:
- Add compost to improve soil structure.
- Avoid overwatering—let soil dry slightly between waterings.
- Re-test every 3–4 months and reapply amendments as needed.
Are there alternatives to a soil pH calculator?
Yes! Try these:
- DIY litmus test: Use red cabbage juice (pH indicator) or pH strips.
- Plant indicators: Clover thrives in alkaline soil; sorrel loves acid.
- Local extension office: Many offer free/low-cost soil testing.
Wrapping up and next steps
Mastering your soil’s pH is the secret sauce for thriving blueberries and azaleas—now you’ve got the tools to make it happen! 🌱 With a soil pH calculator and the right amendments, you’re well on your way to acidic-perfect soil that these plants will love.
Don’t stop here: grab a soil sample, test it again in 6 months, and fine-tune as needed. Happy gardening—your plants are cheering for you!