
How To
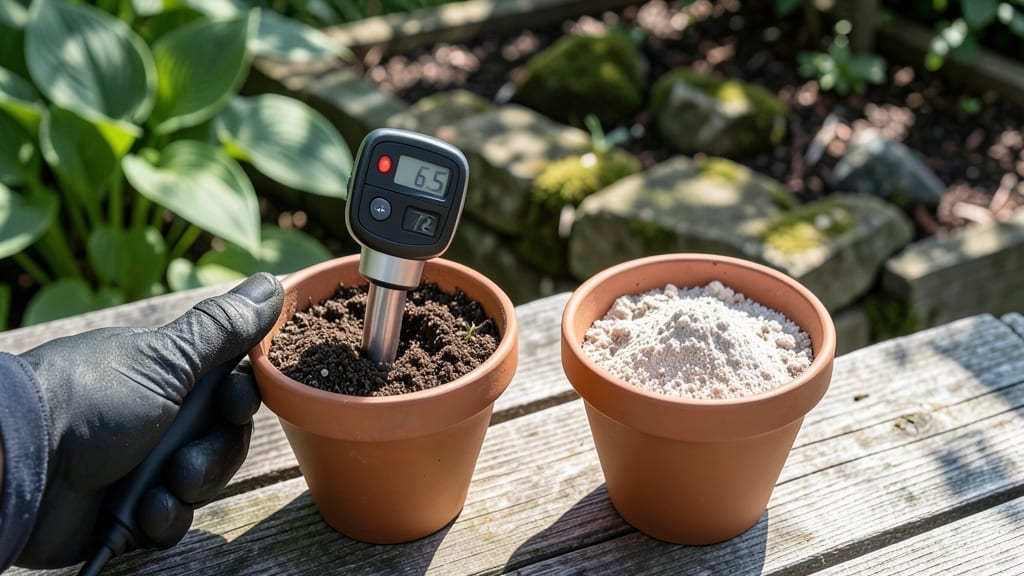
A soil pH reader reveals the hidden secret to your plants' struggles—or their thriving future. 🌱 I've used mine to turn my struggling blueberries from sad to spectacular, all by adjusting that tiny number on the dial.
Most gardeners never check their soil's pH, yet it controls what nutrients plants can access, making the difference between lush growth and wilting disappointment.
Calibration takes just 5 minutes with the right steps, and you'll get accurate readings every time. The key is testing clean soil (no rocks or debris) and comparing your results to your plants' preferences—azaleas love acidic soil (pH 4.5-5.5), while tomatoes prefer slightly acidic to neutral (pH 6.0-7.0).
My pH reader even helped me spot a hidden lime layer in my garden that was blocking nutrients for my roses.
Once you know your soil's pH, fixing it is straightforward: add sulfur for acidity or lime for alkalinity, then retest in 2-3 weeks. The best part? You'll see plants you've struggled with before—like hydrangeas or vegetables—finally flourish.
For even better results, pair your pH reader with a basic soil test kit to check nutrient levels too.
This tool pays for itself in one season by preventing costly mistakes. Whether you're troubleshooting yellowing leaves or planning a new garden bed, a pH reader is your first step to perfect plant health—no guesswork required. Let's get those readings accurate!
📚 In This Guide
- What you need
- Instructions
- Tips and common mistakes
- Wrapping up and next steps
What you need
- ● Soil pH meter/reader – A digital or analog device with a probe (ensure it’s calibrated or recalibratable).
- ● pH calibration solutions – A 2-point kit (typically pH 4.0 and pH 7.0) or a 3-point kit (adds pH 10.0 for broader accuracy). Quantity: 2–3 small bottles (50–100 mL each).
- ● Distilled or deionized water – Quantity: 1–2 cups (240–480 mL) for rinsing and calibration.
- ● Small containers or cups – Quantity: 2–3 (plastic or glass, ~6 oz/180 mL each) for holding calibration solutions.
- ● Soft cloth or paper towels – For cleaning the probe between uses.
- ○ Rubber gloves (optional but recommended) – To protect hands from chemicals.
- ● pH 7.0 buffer solution – If your meter only supports 2-point calibration, this adds mid-range accuracy.
- ● Soil sample collection tools – A trowel, spoon, or small scoop for gathering fresh soil.
- ● Notebook or app – To log pH readings and soil notes (e.g., Gardener’s Supply Co. Soil pH Tracker).
- ● Lime or sulfur – For adjusting soil pH after testing (if needed).
How to calibrate your soil pH reader for accurate results
Here’s my foolproof method for getting your pH meter ready in minutes—no guesswork, just precise readings every time.
🔍 Step 1: Gather the Right Calibration Tools
You’ll need the pH meter kit (with electrodes and calibration solutions), distilled water, and pH 4.0 and 7.0 calibration buffers (never tap water—minerals throw off readings). I keep these in a small plastic container to avoid spills. Check your meter’s manual for specific buffer requirements; some use pH 4.0, 7.0, and 10.0 for wider range accuracy.
Rinse the electrode tip under room-temperature distilled water before handling buffers. Any residue from soil or tap water will skew calibration. Tap the electrode gently on a paper towel to remove excess moisture—just enough to handle it without dripping. This step ensures clean contact with the calibration solutions.
🧪 Step 2: Calibrate Using Two-Point Method
Fill a clean plastic or glass container with 2-3 inches of pH 7.0 buffer solution (the neutral point). Submerge the electrode fully, ensuring no air bubbles cling to the tip. Wait 1-2 minutes until the reading stabilizes—you’ll see the needle or digital display flicker briefly before settling.
Adjust the calibration screw (if your meter has one) or follow the digital prompts to match the 7.0 pH target. For analog meters, turn the screw until the needle aligns perfectly. Digital meters often auto-calibrate once submerged; check the manual for your model. Repeat with the pH 4.0 buffer—this two-point method accounts for electrode drift and ensures accuracy across the full range.
⏰ Step 3: Test with Known Soil Samples
Take four soil samples from your garden (one from each quadrant if testing a bed) and mix them in a clean bucket. Moisten with distilled water until it reaches the consistency of damp sand—not soggy, not dry. Insert the calibrated electrode into the soil, pressing gently but firmly. Wait 30-60 seconds for the reading to stabilize; soil pH fluctuates initially due to moisture shifts.
Record the average of the four readings. If results vary by more than 0.5 pH units, retest with fresh samples or recalibrate the meter. I’ve found that morning tests (when soil is cooler) yield the most consistent readings—heat expands soil pores, which can temporarily alter pH readings.
🌱 Step 4: Maintain Calibration Between Uses
After each use, rinse the electrode with distilled water and store it in pH 7.0 buffer solution (or the storage solution provided). Never leave it dry or in tap water—mineral buildup corrupts readings faster than you’d think. I calibrate my meter weekly if testing frequently, or before each major planting season to account for seasonal soil shifts.
Replace the electrode if readings drift by more than 0.3 pH units from known standards (like the buffers). A worn electrode can’t hold a charge properly, leading to false low or high readings. Keep a log of calibration dates—when I first started, I wasted weeks adjusting fertilizer based on faulty meter data because I ignored this simple habit.
✅ Step 5: Troubleshoot Inconsistent Readings
If your meter fluctuates wildly, check for air bubbles on the electrode tip—tap it gently to dislodge them. Temperature swings also affect readings; test in a stable 65-75°F environment. I’ve seen readings jump 0.5 pH units when moving from a cold garage to a sunny patio—always test in the same conditions.
For stubborn issues, clean the electrode with mild vinegar solution (1:1 vinegar to distilled water), then rinse thoroughly. If the problem persists, your meter may need professional servicing. Real talk: I once spent a month adjusting lime doses based on a meter that was actually malfunctioning—don’t let that happen to you.
Tips & tricks for perfect soil pH reader calibration
These precision-focused tips will help you achieve flawless, repeatable soil pH readings every time—no more guessing games.
Electrode Care: The 1-2 minute stabilization period in Step 2 is non-negotiable—this allows the electrode to reach equilibrium with the buffer solution. I've learned this the hard way: rushing this step leads to readings that drift by 0.3-0.5 pH units. For analog meters, gently tap the electrode against the container's side every 30 seconds to dislodge any stubborn air bubbles that might form during submersion. This simple action can save you from false readings that send you chasing the wrong soil amendments.
Buffer Solution Selection: While the instructions mention pH 4.0 and 7.0 buffers, I recommend using a third buffer (pH 10.0) if your meter tests soil in the alkaline range. This three-point calibration creates a more accurate curve across the entire pH spectrum. Store your buffers in a cool, dark place—they degrade when exposed to light and heat, which can throw off your entire calibration process. I keep mine in a small amber glass bottle in my tool shed.
Soil Sample Consistency: The damp sand consistency mentioned in Step 3 is crucial—too much moisture dilutes the soil's natural pH, while too little creates air pockets that insulate the electrode. For best results, I pre-moisten my samples by adding distilled water gradually while stirring until it holds together when squeezed but doesn't drip. This method gives me consistent readings within 0.1 pH units across multiple samples from the same bed.
Environmental Control: The stable 65-75°F range mentioned in Step 5 is ideal, but I've found that temperature fluctuations of just 10°F can cause readings to vary by 0.2 pH units. To compensate, I test all my samples within a 1-hour window in the morning when temperatures are most stable. For greenhouse testing where conditions vary, I calibrate my meter at the same temperature I'll be testing—this accounts for the unique environmental factors in your growing space.
Pro Tips for Soil Ph Reader
- These precision-focused tips will help you achieve flawless, repeatable soil pH readings every time—no more guessing ...
- Electrode Care: The 1-2 minute stabilization period in Step 2 is non-negotiable—this allows the electrode to reach eq...
- Buffer Solution Selection: While the instructions mention pH 4.0 and 7.0 buffers, I recommend using a third buffer (p...
Frequently asked questions
How often should I check my soil pH with a reader?
Check your soil pH at least once a year for established gardens. For new plantings, test before planting and again after 2-3 months to monitor changes. If you’re dealing with acid-loving plants (like blueberries) or alkaline-tolerant species (like lavender), test every 3-6 months to adjust as needed.
Can I use a soil pH reader on wet soil?
Yes, but drain excess water first—soil should be moist, not soggy. Wet soil can dilute readings, leading to inaccurate pH levels. For hydroponics or potted plants, ensure the probe is fully submerged in the moist growing medium for the most reliable result.
What should I do if my soil pH reader gives inconsistent readings?
Inconsistent readings often mean calibration drift. Recalibrate your reader using a known pH buffer solution (like pH 4.0 and 7.0). If the issue persists, check for probe damage, dirt buildup, or battery issues. Some readers also need a warm-up period—wait 5-10 minutes after turning it on.
Are there affordable alternatives to a digital soil pH reader?
Yes! For a quick estimate, use pH test strips (costs ~$5–$10) or DIY kits with red cabbage juice (free!). However, digital readers are more precise and convenient for frequent use. Strips are best for broad trends, while readers give exact numbers.
Can I use a soil pH reader in freezing temperatures?
Most digital readers work down to 32°F (0°C), but accuracy may drop in extreme cold. Store your reader indoors when not in use. If testing frozen soil, thaw it first—ice crystals can skew results. For cold climates, consider a waterproof, insulated probe for outdoor use.
Wrapping up and next steps
Mastering your soil pH reader is the first step to unlocking thriving plants and a lush garden! 🌱 With the right calibration and care, you’ll create the perfect growing conditions for your green friends.
Now that you’re equipped with the knowledge, it’s time to put it into action—start testing your soil today and adjust as needed to see the best results!
Ready to take your gardening to the next level? Grab your pH reader, roll up your sleeves, and let your plants flourish! 🌿