
Mower
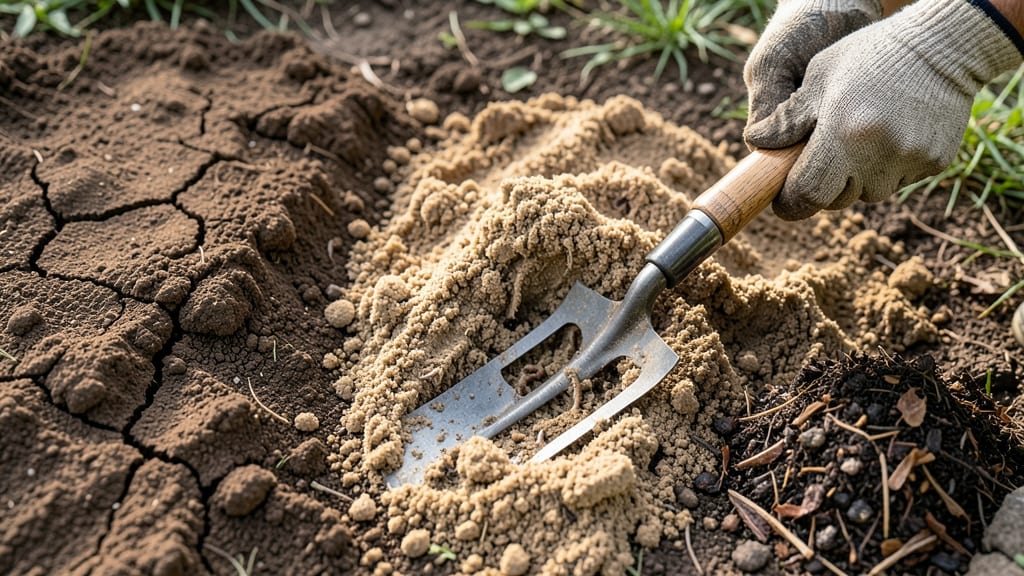
The easiest way to turn soil over without backbreaking work or stubborn weeds is the no-till method I use now—saving me hours while keeping garden beds weed-free without digging. Just a few simple tools and a little patience are all you need. My first attempt left me exhausted and with more weeds than before, but this approach changed everything.
You only need three things: a broadfork (or sturdy garden fork), a tarp, and a sunny day. The broadfork lets you loosen the soil without turning it over completely, which preserves soil structure and beneficial organisms.
Most people overlook how much easier this is than traditional digging—once you try it, you’ll wonder why you didn’t switch sooner.
Within 30 minutes, you’ll have aerated the soil enough to plant directly, and the tarp trick suppresses weeds while keeping the bed ready. The results? Soil that stays loose, fewer weeds, and plants that thrive without the stress of disturbed roots.
No more wrestling with compacted earth or fighting last year’s weeds.
Works for vegetable beds, flower gardens, or even lawn patches—just adjust the depth based on what you’re planting. Here’s how to make it work for your space without the usual hassle.
📚 In This Guide
- What you need
- Instructions
- Tips and common mistakes
- Wrapping up and next steps
What you need
- ● No-till garden fork or broadfork: A sturdy, heavy-duty fork (18–24 inches long) with 4–6 tines to loosen soil without flipping it. Look for ergonomic handles for comfort.
- ● Garden gloves: A pair of durable, breathable gloves (e.g., Mechanix Wear or Wolverine brand) to protect your hands from thorns and sharp tools.
- ● Compost or aged manure: 2–3 gallons per 10 sq. ft. of bed. Use well-decomposed compost (avoid fresh manure—it can burn plants!).
- ○ Mulch (optional but recommended): Straw or wood chips: 2–3 inches thick to suppress weeds and retain moisture.
- ● Cardboard or newspaper: 1–2 layers (shredded) under mulch to block weeds.
- ○ Clear the bed: Remove weeds, rocks, and debris before starting. Pro tip: Use a weed torch (optional) for stubborn weeds in large areas.
- ● Water the soil: Lightly moisten the ground 1–2 days before turning to reduce resistance. 💡 Avoid soggy soil—it clumps and resists the fork!
- ● Sunny day: Choose a dry, overcast day to work. Wet soil sticks to tools and makes flipping harder.
- ● Kneeling pad: For comfort during long sessions.
- ● Wheelbarrow: To haul compost or mulch efficiently.
- ● Soil pH tester: Check your soil’s health before amending with compost.
Step-by-step instructions for no-till soil flipping
This method saves your back and keeps weeds suppressed—no heavy digging required.
Clear the Surface and Mark Your Beds
Start by removing any large debris, rocks, or weeds from the bed surface. I like to use a stiff broom or leaf rake to sweep away loose plant matter—this prevents it from getting buried deeper where it could decompose unevenly. Next, use wooden stakes or string to outline your planting rows if you haven’t already. This keeps your flipping process organized and prevents overlapping beds.
Measure your bed width and mark every 12-18 inches with stakes—this spacing works perfectly for most vegetables. The reason for this precision is that it aligns with standard tool widths (like a hoe or rake) and prevents you from overworking the soil in one area. Think of it as creating a grid where you’ll work in neat sections.
Use a Broadfork to Loosen Soil Without Inversion
Insert a broadfork (or digging fork) into the soil at a 45-degree angle, about 6-8 inches deep. Push down firmly with your foot on the handle, then rock the fork back and forth gently to break up compacted layers. The goal here isn’t to flip the soil but to create vertical channels that improve drainage and root penetration.
Work in a systematic pattern—start at one edge of your marked bed and move forward in 6-inch increments, overlapping slightly with each pass. You’ll feel resistance at certain depths; that’s where old root systems or compacted layers lie. Pause and apply extra pressure there. Avoid walking on the bed unless necessary, as it can compact the soil again.
Top-Dress With Organic Matter and Mulch
Spread a 2-3 inch layer of compost or well-aged manure evenly across the bed. I prefer compost because it breaks down slowly and adds structure without overheating the soil. Use a rake to distribute it uniformly—you want it to cover the entire surface but not pile up in one spot. This layer will feed your plants as it decomposes and suppress weeds by blocking light.
Follow this with a 1-2 inch layer of straw or wood chips. Press it lightly into the compost with your hands or a rake, just enough to make contact. The mulch will protect the compost from drying out and prevent weed seeds from germinating. Leave the edges slightly higher than the center to help with water retention during irrigation.
Plant Directly Into the Prepared Bed
Create small trenches or holes in the mulch layer just deep enough to accommodate your seeds or transplants. For seeds, aim for a depth of about twice the seed’s diameter—this ensures they have enough moisture to germinate without rotting. Water the trenches lightly before planting to settle the soil and remove any air pockets.
Place seeds or seedlings carefully, then cover them with a thin layer of the compost you added earlier. Avoid burying stems too deeply, as this can cause rot. If you’re planting transplants, firm the soil gently around the base to eliminate air gaps. The mulch above will hold moisture and regulate temperature, so you won’t need to water as frequently as you would in bare soil.
Maintain with Minimal Disturbance
Water the bed deeply after planting, then monitor the mulch layer. Keep it 2-3 inches thick throughout the growing season by adding more straw or compost as it breaks down. I find that watering in the early morning allows the mulch to dry slightly during the day, reducing the risk of fungal issues.
Weeds will still appear, but they’ll be easy to pull because they grow on the surface. Use a hoe to cut them off at the base if they become numerous. The key here is to avoid tilling or digging—every time you disturb the soil, you bring fresh weed seeds to the surface. Instead, focus on keeping the mulch intact and adding fresh organic matter every few weeks to maintain fertility.
Tips & tricks for perfect no-till soil flipping
This gentle approach transforms your garden beds without the back-breaking labor of traditional tilling—here's how to make it even easier.
Tool Selection Matters: A broadfork is your best friend for this method, but if you don't have one, a sturdy digging fork works too. The key is the 45-degree angle—this creates those essential vertical channels without inverting the soil. I've found that wider tines (about 6-8 inches apart) work better for breaking up compacted layers, especially in clay-heavy soils. If you're working in rocky soil, consider a garden fork with shorter tines to avoid damaging your tools.
Precision in Marking Pays Off: Those 12-18 inch stakes you're marking with aren't just arbitrary measurements—they align perfectly with standard tool widths. When you work in these sections, your broadfork will cover the entire width without overlapping or leaving gaps. Pro tip: Use a measuring tape to mark your first stake, then use a string line to create perfectly straight rows. This organization prevents you from overworking any single area, which is crucial for maintaining soil structure.
Layering Technique for Long-Term Benefits: When you spread that 2-3 inch compost layer, think of it as building a soil sandwich. The compost feeds your plants, while the 1-2 inch straw layer above protects it from drying out. Here's what I've learned: press the mulch just enough to make contact with the compost below—this creates tiny air pockets that help with moisture retention without suffocating your plants. Also, the edges should be slightly higher than the center to create a natural water catchment basin during irrigation.
Planting Depth Secrets: That "twice the seed's diameter" guideline might seem simple, but it's actually a science. For example, tomato seeds (about 1/4 inch diameter) should go in 1/2 inch deep, while carrot seeds (1/8 inch) need only 1/4 inch. Watering those trenches lightly before planting removes air pockets that could prevent germination. And here's a little-known trick: if you're planting seeds with very hard coats (like beans), soak them overnight first—they'll germinate faster in your prepared beds.
Pro Tips for Easiest Way To Turn Soil Over
- This gentle approach transforms your garden beds without the back-breaking labor of traditional tilling—here's how to...
- Tool Selection Matters: A broadfork is your best friend for this method, but if you don't have one, a sturdy digging ...
- Precision in Marking Pays Off: Those 12-18 inch stakes you're marking with aren't just arbitrary measurements—they al...
Frequently asked questions
Got questions about turning soil over the easiest way possible? You’re not alone!
Here are answers to the most common concerns—from timing to tools and troubleshooting—so you can tackle your garden like a pro.
When is the best time to turn soil over?
Turn soil in early spring or fall when the ground is workable but not frozen or waterlogged. Avoid turning wet soil—it compacts easily and can damage plant roots. For no-till methods, focus on top-layer flipping (3–4 inches deep) in late winter to break up weeds before planting season.
What’s the easiest tool for turning soil without back pain?
For minimal effort, use a broadfork or garden fork—they loosen soil with less strain than a shovel. If you’re dealing with tough clay or weeds, a rototiller (even a small electric one) saves time. For no-till flipping, a stiff garden rake or soil knife works great for shallow turns.
Will turning soil kill weeds permanently?
No, but flipping soil exposes weeds to sunlight, killing seedlings and preventing seed germination. For stubborn weeds (like bindweed), repeat the process 2–3 times over a few weeks. Pair this with mulching or vinegar spray for a weed-free edge. No-till flipping disrupts weed roots without deep disturbance.
Can I turn soil if it’s already planted?
Only if you’re replanting or renovating beds. Avoid turning soil around established plants—it can damage roots and disrupt soil microbes. For no-till gardens, flip soil between crops or in unplanted sections to refresh the bed without harming what’s growing.
What if my soil is too hard to turn?
Break it down gradually! First, water the area lightly to soften clay, then use a fork to pry chunks apart. For compacted soil, add compost or aged manure and let it sit for a week before retrying. If the ground is rock-hard, focus on shallow flipping (1–2 inches) to avoid frustration.
Pro Tip:
For no-till flipping success, work in small sections (2’x2’) to avoid fatigue. Pair with a soil solarizer (clear plastic sheet) in summer to bake out weeds before planting—zero tilling required!
Wrapping up and next steps
Turning over your soil doesn’t have to be a backbreaking chore—with the right tools and techniques, like no-till flipping, you can create a weed-free, nutrient-rich garden bed in no time! 🌱 Whether you’re using a broadfork, a manual soil knife, or even a simple spade, the key is working with your soil’s natural structure to avoid compaction and fatigue.
Start small, stay consistent, and soon you’ll have a thriving garden that feels as good to tend as it looks.
🚀 Ready to Dig In?
Now that you’re armed with the easiest methods, grab your tools and give it a try! Begin with one bed, experiment with different techniques, and watch your garden transform. Happy gardening—and may your soil always be light and fluffy! 🌿