
How To
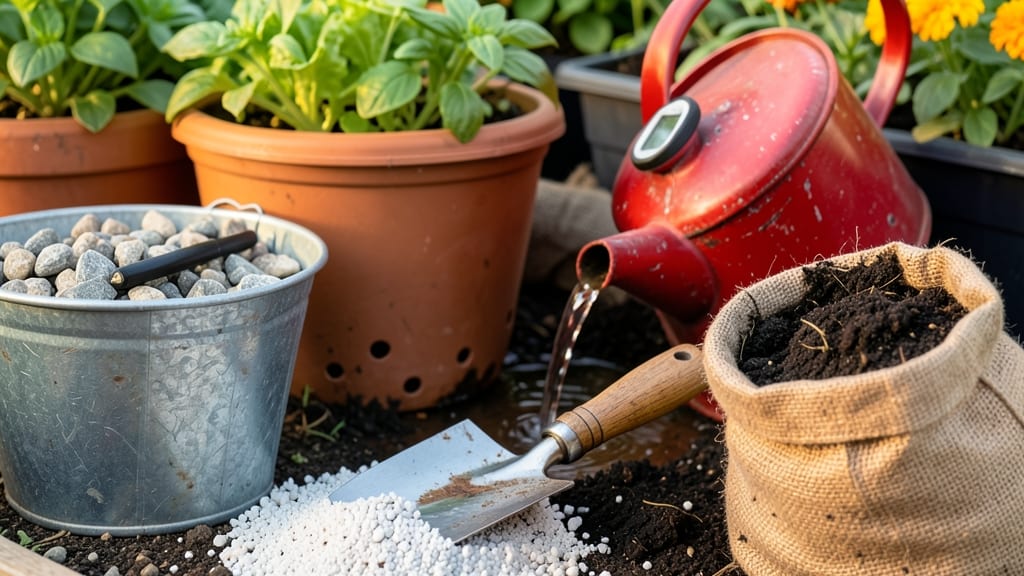
My soggy garden beds were drowning plants before they even sprouted—until I learned how to make soil drain better with a simple coarse sand and perlite mix. 🌱 The fix isn’t complicated, but it changes everything: no more wilting seedlings, no more fungus gnats, and roots that breathe instead of rot.
This method works for containers, raised beds, and in-ground soil alike. Start with a 50/50 mix of coarse sand (not fine beach sand) and perlite—both create air pockets that let water flow through.
For heavy clay soil, work in 2-3 inches of the mix per square foot, or blend it into potting soil for containers. The key is uniformity: clumps defeat the purpose, so sift everything before mixing.
You’ll see the difference immediately—water pools disappear within 10-15 minutes instead of hours, and plants perk up within days. Even my black thumb’s tomatoes now thrive in summer’s downpours. The best part? This fix lasts 2-3 years before you’ll need to refresh the mix.
For clay-heavy soils, consider raised beds or gravel layers at the bottom of containers. And skip the cheap perlite—grade #4 or #5 is what professionals use for consistent results. Let’s get your soil working for you, not against you.
📚 In This Guide
- What you need
- Instructions
- Tips and common mistakes
- Wrapping up and next steps
What you need
- ● Coarse sand: 5–10 gallons (or ~20–40 lbs). Specs: Use builder’s sand or masonry sand (avoid fine sand—it compacts!). Gritty texture = better drainage.
- ● Perlite: 2–5 gallons (or ~10–20 lbs). Specs: Lightweight, porous volcanic rock. Do NOT use vermiculite—it retains moisture.
- ● Garden trowel or shovel: For mixing and amending soil in beds.
- ● Wheelbarrow or large bucket: 5+ gallon capacity to mix materials.
- ● Gloves & dust mask: Perlite/sand can be gritty—protect your lungs and hands!
- ● Watering can or hose with a gentle nozzle: For moistening soil before mixing.
- ● Pine bark fines or coconut coir: 1–2 gallons. Adds organic matter and aeration.
- ● Compost: 1–2 gallons (if your soil is very dense). Improves structure over time.
- ○ Soil test kit: Check pH/drainage before/after amending (optional but super informative!).
- ● Plastic sheeting: Lay down to protect surfaces while mixing large batches.
Step-by-Step guide to improving soil drainage for healthier roots
Here’s the method I’ve used to transform compacted soil into a loose, well-aerated growing medium—ideal for everything from containers to garden beds.
🪴 Step 1: Test Your Soil’s Current Drainage
Before adding anything, you need to know what you’re working with. Grab a handful of moist soil and squeeze it firmly in your palm. If it holds its shape like a brick or oozes water when you release it, your drainage is poor. For a quick test, dig a small hole, fill it with water, and time how long it takes to drain—if it’s still wet after 30 minutes, you’ve got work to do.
I like to use a simple jar test for accuracy: Fill a clear jar halfway with soil, add water until it reaches the top, then cover and shake. After 24 hours, if there’s still standing water or a thick mud layer at the bottom, your soil needs major help. This step ensures you’re not wasting materials on soil that’s already fine.
💧 Step 2: Mix Coarse Sand and Perlite in the Right Proportions
For most garden soils, blend 1 part coarse sand with 1 part perlite—this creates the perfect balance of texture and aeration. Coarse sand (not fine beach sand) prevents compaction, while perlite adds lightweight porosity. Measure carefully: use 1 cubic foot of each per 4 cubic feet of existing soil for noticeable improvement.
Spread the materials evenly over the soil surface and use a garden fork or tiller to mix them in to a depth of 6-8 inches. Work in sections if your area is large—this keeps the mix uniform and prevents pockets of unamended soil. Avoid over-mixing; you want the amendments distributed, not pulverized into the ground.
☀️ Step 3: Incorporate Organic Matter for Long-Term Structure
While sand and perlite improve drainage immediately, adding 2-3 inches of compost or aged manure helps stabilize the soil’s structure over time. Organic matter binds the amendments together, preventing them from washing away during heavy rains. Spread it evenly over the amended soil and mix it in lightly—just enough to integrate without compacting.
Water the area thoroughly after mixing to help the amendments settle into place. You’ll see water bead up on the surface briefly, then sink in smoothly—this is your signal that drainage is working. If water pools or runs off in sheets, you may need to add more perlite or work the mix deeper.
✂️ Step 4: Test and Adjust for Plant-Specific Needs
Different plants thrive with different drainage levels. Succulents and cacti need fast-draining soil, so increase perlite to 2 parts per 1 part sand. For vegetables and flowers, the 1:1 mix works best. After planting, monitor how quickly the soil dries—if it stays soggy for more than a few days, add another 1 inch of perlite and mix it in.
Here’s the thing—amended soil settles over time. Re-test drainage every 3-6 months, especially in container gardens where soil compacts faster. A quick poke with a finger tells you everything: if it feels loose and crumbly, you’re golden. If it’s dense again, repeat the mixing process with fresh amendments.
Tips & tricks for perfect soil drainage
Transforming your soil from a waterlogged mess to a well-draining haven takes more than just throwing in some sand—here’s how to get it right the first time.
Soil Test Precision: The 30-minute water test in Step 1 isn’t just about timing—it’s about understanding your soil’s baseline. If water disappears in under 10 minutes, you’ve got naturally fast-draining soil and can reduce the perlite ratio to 1 part perlite to 2 parts sand for a lighter texture. For clay-heavy soils that hold water past 30 minutes, stick to the 1:1 mix but consider adding an extra ½ inch of perlite for extra insurance.
Material Selection Matters: Not all sand is created equal! Construction sand or masonry sand works, but never use fine beach sand—it compacts just like your existing soil. For perlite, look for grade 4 or 5 (the coarser grades) which won’t break down as quickly. I’ve learned this the hard way after ruining two raised beds with the wrong materials.
Mixing Technique: When you’re working that 6-8 inch depth in Step 2, think of it like making a layered cake—not a smoothie. Use a garden fork to create vertical channels that let water move downward. For large areas, work in 3-foot squares to maintain consistency. The goal is to break up compaction without turning your soil into a sand-and-perlite slurry.
Organic Matter Timing: The 2-3 inches of compost in Step 3 should go on after you’ve mixed in your sand and perlite. Adding it first creates pockets where amendments separate, leaving you with uneven drainage. Spread it like a blanket over the amended soil, then lightly scratch it in just enough to integrate—think "marble cake" texture, not "pancake batter."
Pro Tips for Make Soil Drain Better
- Transforming your soil from a waterlogged mess to a well-draining haven takes more than just throwing in some sand—here’s how to get it right the first time.
- Soil Test Precision: The 30-minute water test in Step 1 isn’t just about timing—it’s about understanding your soil’s baseline.
- Material Selection Matters: Not all sand is created equal!
Frequently asked questions
Got questions about improving soil drainage? You’re not alone! Here are some of the most common concerns—and straightforward answers—to help you get it right.
How often should I check my soil’s drainage after making changes?
After adding a coarse sand or perlite mix, test drainage every 2–4 weeks. Water your plants, then wait 10–15 minutes. If water pools on the surface or drains too quickly (like a sieve), adjust the mix or add organic matter (like compost) to balance it. Consistency is key!
What if my plants start wilting after improving drainage?
Wilting can happen if the soil drains too fast, leaching nutrients or drying out roots. Try mixing in 10–20% organic material (like peat moss or coconut coir) to retain moisture while keeping drainage efficient. Water deeply but less frequently to help roots adjust.
Is perlite or coarse sand cheaper for large gardens?
Coarse sand is usually the budget-friendly winner—it’s often sold in bulk (e.g., 40-lb bags) for $5–$10, while perlite can cost $10–$20 for the same volume. For big projects, sand + compost (a 50/50 mix) is a cost-effective alternative. Just avoid fine sand—it compacts over time!
Does improving drainage work in clay-heavy soil?
Clay soil is notorious for poor drainage, but a 30–50% mix of coarse sand/perlite can break it up. For stubborn clay, amend the top 6–12 inches of soil and consider raised beds if your garden is heavily compacted. Patience helps—results may take a season or two to fully show.
Can I reuse old potting mix with poor drainage?
Yes, but refresh it! Sift out large clumps, then blend in 20–30% perlite or coarse sand. Avoid overloading with amendments—stick to a 1:3 ratio (amendment to old mix) to prevent nutrient loss. Sterilize the mix with heat (200°F for 30 minutes) if you suspect disease.
Still stumped? Drop your specific soil type or plant needs in the comments—we’re happy to help troubleshoot!
Wrapping up and next steps
Improving soil drainage doesn’t have to be complicated—just a little coarse sand, perlite, and patience can work wonders for your plants! 🌱 By following these steps, you’ll create a healthier root environment, prevent waterlogging, and give your garden the boost it deserves.
Start small, test your mix, and watch your plants thrive.
Ready to take action? Pick a project—whether it’s a potted plant, raised bed, or garden patch—and get mixing! Your future greenery will thank you. 🌟